


 Reply With Quote
wow! looking pretty deadly to me.

Results 1 to 10 of 18
Thread: Thorton's Ammonite
-
01-04-2010, 10:55 PM #1Senior Member

- Join Date
- Jun 2008
- Posts
- 123
Thorton's Ammonite
So has anyone on the board tied and fished the Ammonite pattern by Thorton? I tied up a few and they look great. Note I have one closely following his instructions, and another woven. The weave makes the fly a little easier (at least for me), though its a time investment either way between building up the body taper and the body itself. Anyway, thoughts, appreciated...
Traditional

Woven - the wingcase is a bit screwy, I'm still learning the pattern...

-
01-04-2010, 11:01 PM #2World Record Trout
- Join Date
- Feb 2007
- Location
- Denver, North Shore MA and Midcoast Maine, USA
- Posts
- 1,464
Re: Thorton's Ammonite
-
01-04-2010, 11:03 PM #3Member
- Join Date
- Sep 2007
- Posts
- 44
Re: Thorton's Ammonite
The wingcase is screwy? Please. jovalle those are sick ties, i guess I'll have to check out Thornton.
-
01-04-2010, 11:56 PM #4*TPO Founder*
- Join Date
- Jan 2007
- Location
- New Jersey
- Posts
- 7,771

Re: Thorton's Ammonite
Can I try a few of the lower one out?? Maybe put a yellow underbody on it? I will see how well they work. I will even be brave and do it in the cold of winter
 Just send me a few dozen in all the colors...
-
01-05-2010, 07:56 AM #5Senior Member
- Join Date
- Jun 2008
- Posts
- 123
Re: Thorton's Ammonite
Aaron, you should have no problem doing either. Maybe I'll post step by steps tonight.
-
01-05-2010, 05:40 PM #6Alaskan Steel
- Join Date
- May 2009
- Location
- Formerly CT, now in the Colorado Rockies!
- Posts
- 690
Re: Thorton's Ammonite
Those are some awesome looking flies and great camera shots. The pictures almost look like they're drawn...
"I am not against golf, since I cannot but suspect it keeps armies of the unworthy from discovering trout."
-Paul O'Neil
-
01-05-2010, 06:31 PM #7*TPO Rockstar*
- Join Date
- Mar 2009
- Location
- nyc
- Posts
- 109
Re: Thorton's Ammonite
yep....pretty dam flies!! I love the translucence of the first one. What did you build up the body with? mono? I can see the hook!
-
01-05-2010, 08:40 PM #8Administrator
- Join Date
- Sep 2009
- Posts
- 22
Re: Thorton's Ammonite
those are sick!
-
01-05-2010, 11:04 PM #9Senior Member
- Join Date
- Jun 2008
- Posts
- 123
Re: Thorton's Ammonite
Tying instructions...
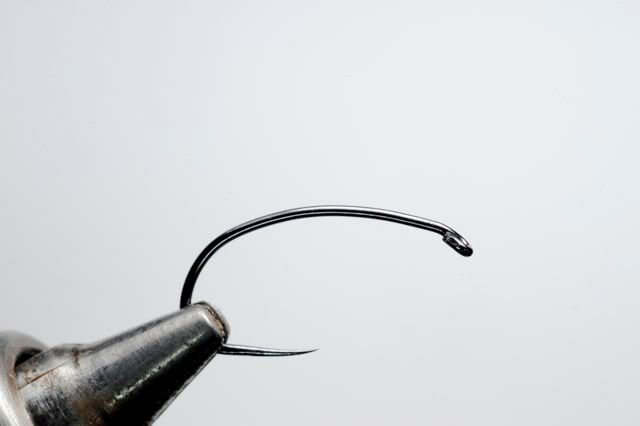
Hook: Knapek G10 Scud/Czech Nymph
Thread: GSP 50 White
Lead: first two, flattened .15, thereafter fine flat lead wire
Body: embroidery thread
wire: red midge wire
wingcase: flexi-body (this is also the body on the green one)
legs: hungarian partrige
dubbing: SLF Bug Dub, pinch o' red for hotish spot, grey thereafter
Back of body is varnish
Color wingcase to suit with marker (I forgot in the sequence)
Set hook. Thornton does this fairly precisely so that the barb (point) establishes the body transition, and you start the body near where the hook meets the vise. Buy his book, Listen to the River, its worth it and sterling is low these days so they are comparatively cheap.
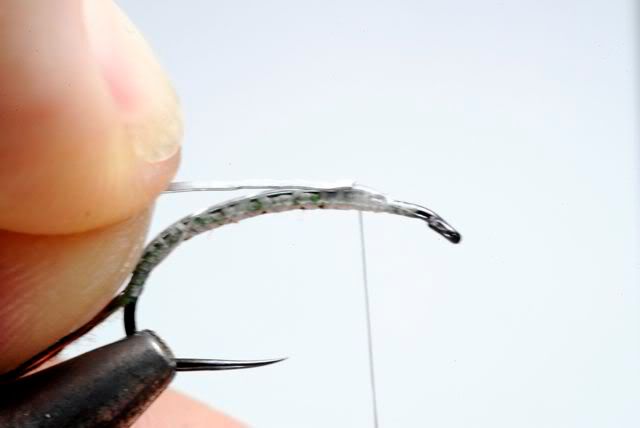
tie in the weaving thread, I do underbody nearside

shell far

tire in wire rib on top

Now the fun begins, because I only have fine flat lead wire, I take .15 round lead wire and flatten it with pliers. Note that the first layer is well aft of the hook eye and I haven't taken any thread to the eye in setting the underbody. Here is the tie in of the second layer, still .15 flattened, note how it is stepped back about one eye.
I'm wrapping the lead twice at tie in, spinning the thread so that it is tight, then opening up the thread to do spiral wraps with low tension as I secure the lead to the hook.
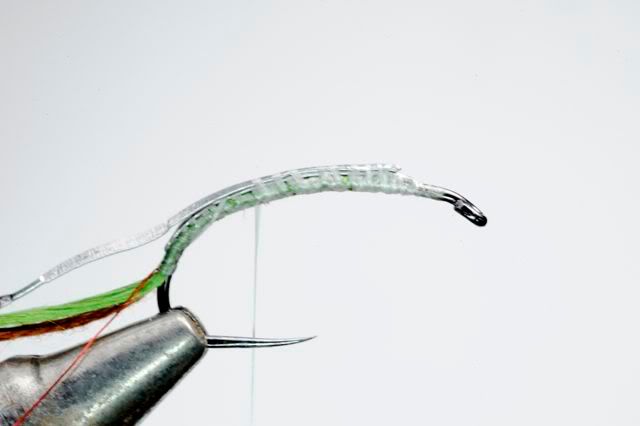
Though not well illustrated here, because I'm trying to take a photo, the rear taper is more abrupt, and I am pinching the lead off by twisting the thread and applying more tension on the final wrap, as opposed to twisting it off, which is what it appears I am doing. This is very useful as the lead body tends to get very unstable as you build up layers, and you can crush it and shift the lead around if you are not careful.

Continue to step back, building the taper up like stairs.

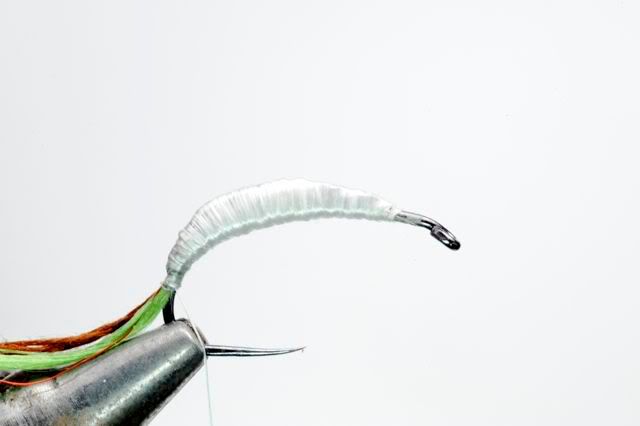
I'm done. Now, Thorton colors the underbody, maybe to eliminate the hook as you see in the green version above, but also to build a smooth taper. He also advocates smoothing the lead with the back of your fingernail, which is very useful.

Because I'm impatient, I just open up the thread and wrap a quick smooth underbody. If you use GSP, watch for it slipping. I do a whip finish at the tail and cut the thread.
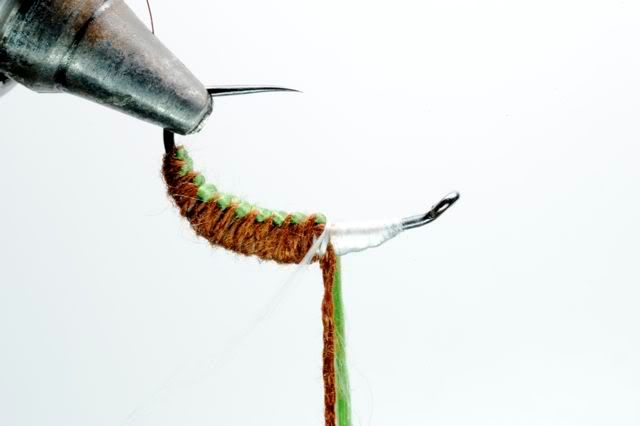
As with all weaving, flip the fly over and start your weave. Note the point at which I stopped to take this photo, I screwed up the weave there and you can see it clearly as the fly is finished. Weaving is much easier if you just shoot through it, maintaining tension.

Weave well past the point at which you want to terminate the body - I find this to be useful for all types of woven flies. Every time I do a weave, I try to take the weave to the eye. This way, you can "burnish" the back and have enough thread to push around and fill gaps. Also note, on this pattern, because of the body, it helps to tilt the back thread rearward, similar to dry fly hackling, so you obtain sufficient coverage, there is a big difference in the amount of body each back wrap has to cover relative to the underbody because of the diameter.

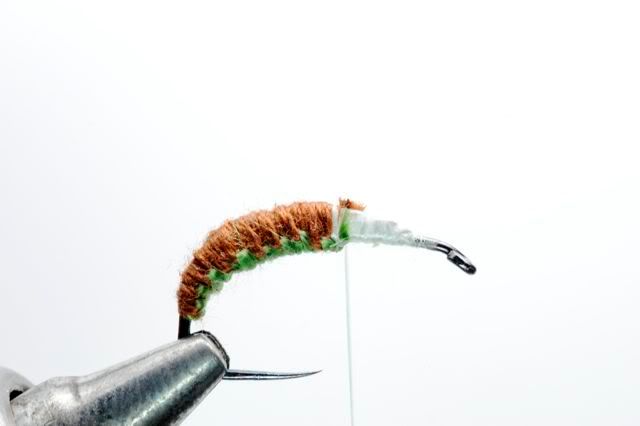
Now, I rotate the vise and tie in thread a weave ahead of where I want to tie in the wing case. I've overwrapped one of my weaving threads to secure the weave.

Now that the weave is secure, its time to bring back the weaving thread to where you tied off everything.
Now you can clip the weaving thread.
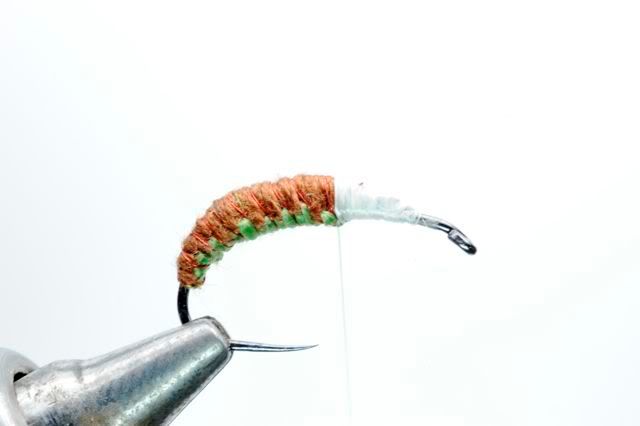
And wrap over the weaving thread to create a smooth transition. Here, I've done a whip finish as a precaution, and have the wire in hackle pliers because I like to wind the wire on a woven body via the rotary vise. Many here will say its a waste, but I find being able to look at the whole body as you wrap the wire is helpful in hitting each notch and ensuring the wire doesn't screw with the weave.

Wire wrapped. Note I counter-ribbed, which is wrong. Don't do it.
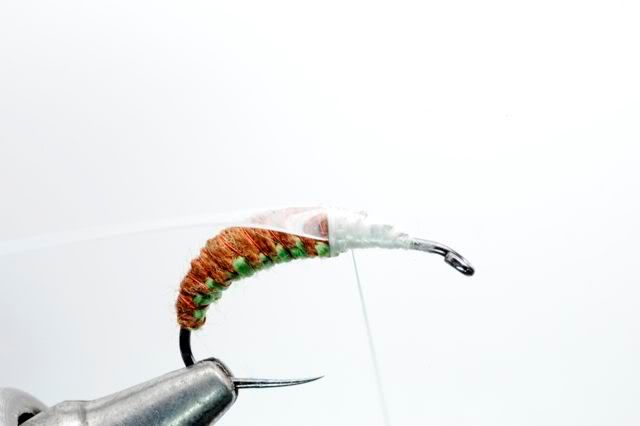
Now, tie in a 4mm strip of flexibody, or whatever you want to use as the wingcase. Its very important that the wingcase is sufficiently large so as to cover both sides equally, which is what I'm trying to show in the next two photos.

See, both sides cover the back

Flexibody is nice because you can really mash the tag into the body creating a smooth transition.
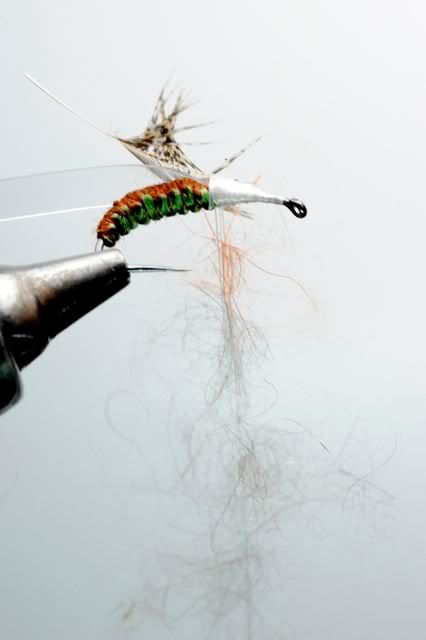
Now, select a wet fly hackle, here Hungarian partridge, though I've also used others. The length needs to exceed the hook gap.

Secure it well, because you need to pull it tight over the dubbing

Now for the dubbing. Flatten the thread and split it. Insert dubbing into the pseudo loop.
Spin the bobbin. This helps the legginess effect - if you haven't seen these wet, they are even sicker.

Dub up.

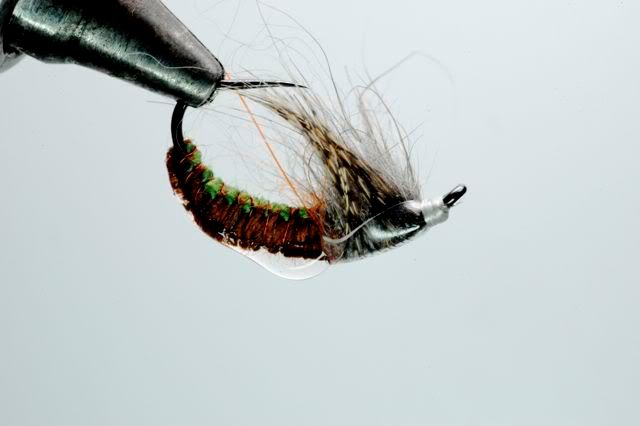
Now pull the dubbing down and to the side, like an old man stroking his beard.

Pull the hackle forward, I used some flexament to secure while taking the photo, but I generally don't like to glue.

Pull forward the wing case - again I have the problem with the flared sides. I've only done about 8 of these so far, so I'm still learning - I may need to improve my tie in of the wingcase - any thoughts appreciated.

Whip finish and you think you're done...

Now get out the varnish, I apply a brush stroke to the spine to get a good amount on the back. I have mine fairly runny.

Now, start rotating that bad boy around to spread the varnish a bit.
I find using my bodkin is helpful in drawing the varnish to parts of the back that I want to cover.

Once you've pulled the varnish to where you want coverage, its time to add some more.
And rotate it around a bit more...
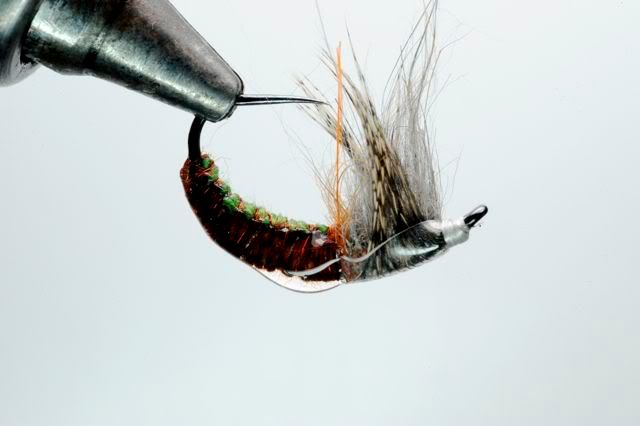
To create a better body shape and smooth transition to the wing case, I shift the orientation of the hook forward, looks about done.

Now flip it over, see how bushy the dubbing is?

Cut a v notch in the dubbing belly to promote legs rather than blob.

All finished except for the wingcase color

-
01-05-2010, 11:26 PM #10*TPO Founder*
- Join Date
- Jan 2007
- Location
- New Jersey
- Posts
- 7,771
Re: Thorton's Ammonite
The varnish must make that fly sink like a rock! You're right, not hard. I might add some tails to them.

